
Start with one vehicle and one problem
A truck that cannot climb a muddy bank does not need a shopping list of everything in the garage. It needs you to work out whether the wheels are spinning, the engine is struggling, or the body is hanging on a rock. Spending against that problem makes the next trip easier to judge.
Pick a vehicle you enjoy driving and give it a few trips before spreading Pebbles across the whole garage. You will unlock more cars, but each new project brings another set of upgrades to pay for. Keep enough currency for the part that fixes the obstacle in front of you.
What to buy first: use the failed attempt as your shopping list
Take another look at the spot where you stopped making progress. Wheelspin calls for a different response from a chassis resting on the crest of a rock. A longer winch also changes what you can reach; it does not turn an awkward pull into a better driving line.
Low range and a cleaner approach are worth trying before another purchase. When you do upgrade, return to a familiar obstacle. You will learn more from one repeat attempt than from changing five systems and immediately driving somewhere else.
| What is going wrong? | Useful next purchase | What still needs care |
|---|---|---|
| Wheels spin on a climb | Tires Stage 2: 25 Pebbles | Choose a line with contact under the tyres; the upgrade is not a grip guarantee. |
| The engine struggles to keep pulling | Engine Stage 2: 25 Pebbles | Use low range and avoid arriving sideways at the steepest part. |
| The underside catches on rocks | Suspension Level 2: 25 Pebbles | Try moving a wheel onto the rock instead of straddling it. |
| Your chosen equipment will not fit | Second tool slot: 25 Pebbles | Decide what you actually need for this trip. |
| Useful anchors are out of reach | Winch Stage 2: 25 Pebbles | Look for a pull that moves the vehicle onto better ground. |
| Repeated impacts are ending trips | Protection Stage 2: 25 Pebbles | Slow down on descents; protection reduces damage rather than removing it. |
Read the stage numbers before paying
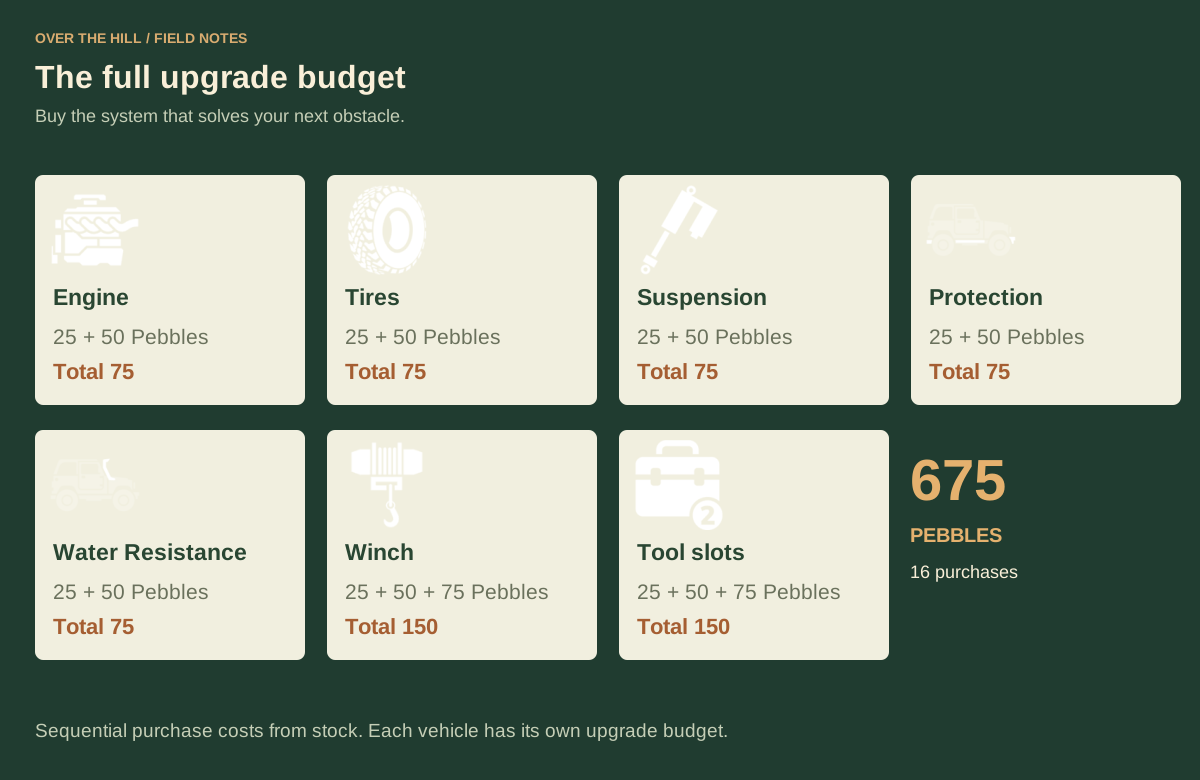
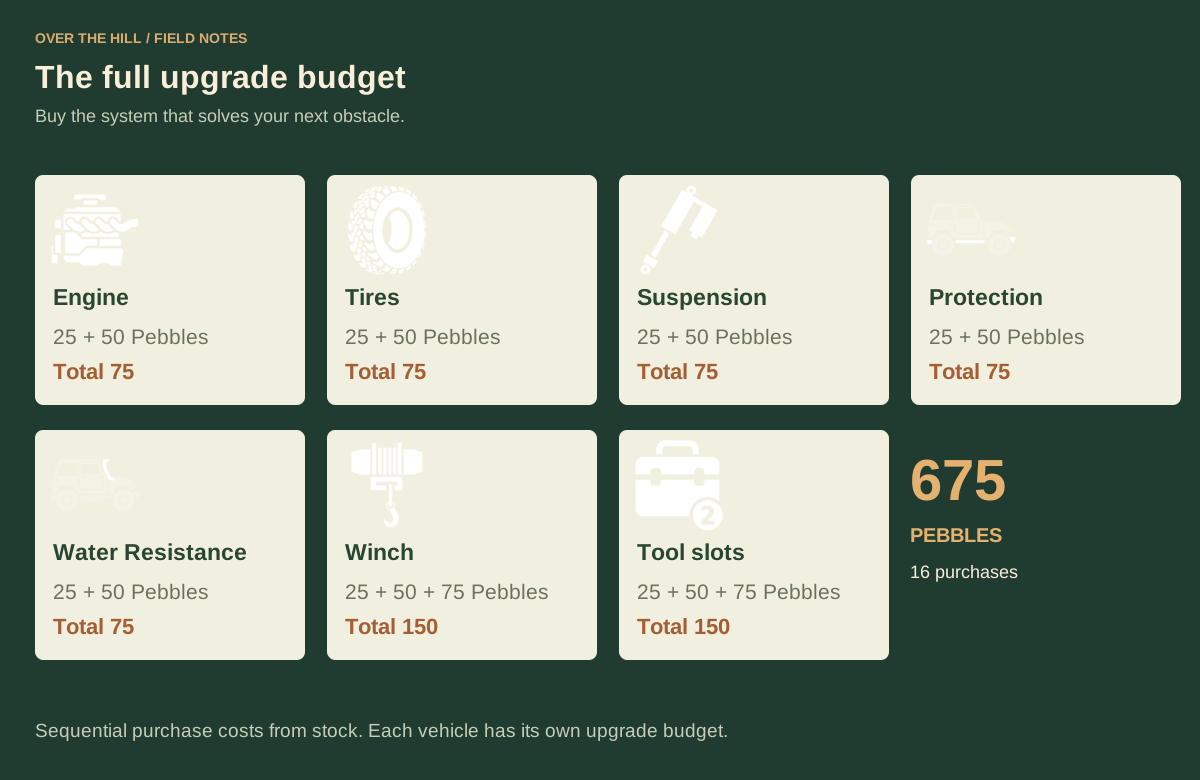
The stock engine is Stage 1. The first engine purchase is called Stage 2 and costs 25 Pebbles; Stage 3 is the next purchase at 50. That second purchase costs 50 by itself, so reaching Engine Stage 3 from stock costs 75 in total.
Inventory names work differently: the purchases give you two, three and four total tool slots. Do not read the final inventory upgrade as four extra slots. Winch upgrades have a third paid stage, which is one reason the full budget is larger than seven lots of 75.
| Upgrade system | Successive purchase prices | Total from stock |
|---|---|---|
| Engine | 25 + 50 | 75 Pebbles |
| Tires | 25 + 50 | 75 Pebbles |
| Suspension | 25 + 50 | 75 Pebbles |
| Protection | 25 + 50 | 75 Pebbles |
| Water resistance | 25 + 50 | 75 Pebbles |
| Winch | 25 + 50 + 75 | 150 Pebbles |
| Tool slots | 25 + 50 + 75 | 150 Pebbles |
| All 16 purchases | Seven systems | 675 Pebbles |
Take the first-clear money while you explore
Early on, a trip can pay in several ways without turning into a farming loop. Open a crate you pass, register a new animal, and finish a challenge when the route suits your vehicle. The first completion often combines Pebbles with a useful unlock.
Keep those rewards separate. A crate cosmetic is not a performance upgrade, and a vehicle reward does not mean every challenge awards a car. In Emerald Lake, Elizabeth Oath gives Kayaks; the two vehicle rewards come from Windy Joe and Hermit.
| Emerald Lake objective | First completion | Later completion |
|---|---|---|
| Windy Joe Trail | The Trail Burner + 25 Pebbles | 5 Pebbles |
| Elizabeth Oath Trail | Kayaks + 15 Pebbles | 3 Pebbles |
| Hermit Trail | The Burro + 40 Pebbles | 8 Pebbles |
Repeat trails pay less than the first clear
The October 16 update fixed missing Pebble rewards on repeated objectives. Advice that says completed trails can never pay again is out of date. The other mistake is treating the first-clear number as the repeat payout.
Use a familiar trail when you want predictable driving, then compare the smaller payout with the effort it takes you. Hermit's repeat reward is larger than Windy Joe's, but it also has 31 ordered checkpoints instead of 11. A bigger number at the finish is not enough to call it the fastest way to earn currency.
Check your balance after the finish. If an expected payout does not arrive, confirm that the challenge completed and that the game is updated before copying an old workaround. There is no need to reset a save to test whether a repeat reward works.
Meteorite hunting: leave the old Demo spots behind
A meteorite pin is a possible landing position. It is not a permanent ore node waiting for you on every visit. The October update also adjusted spawn positions, so heading straight back to a remembered Demo rock can leave you searching an empty patch of ground.
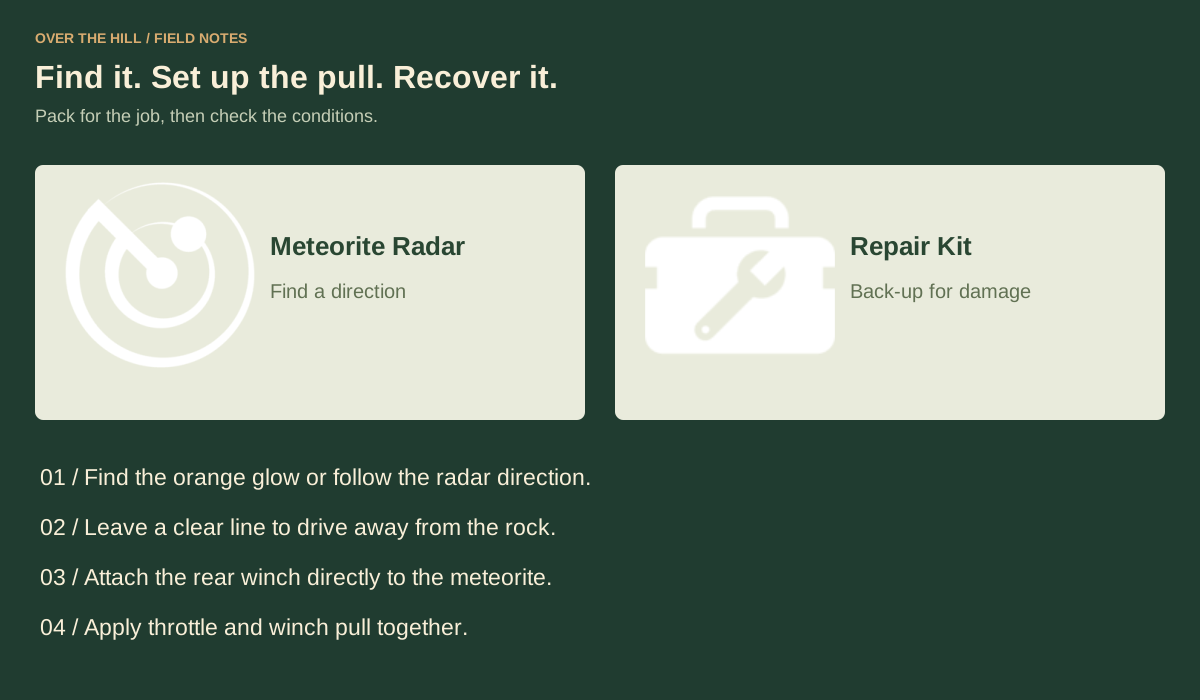
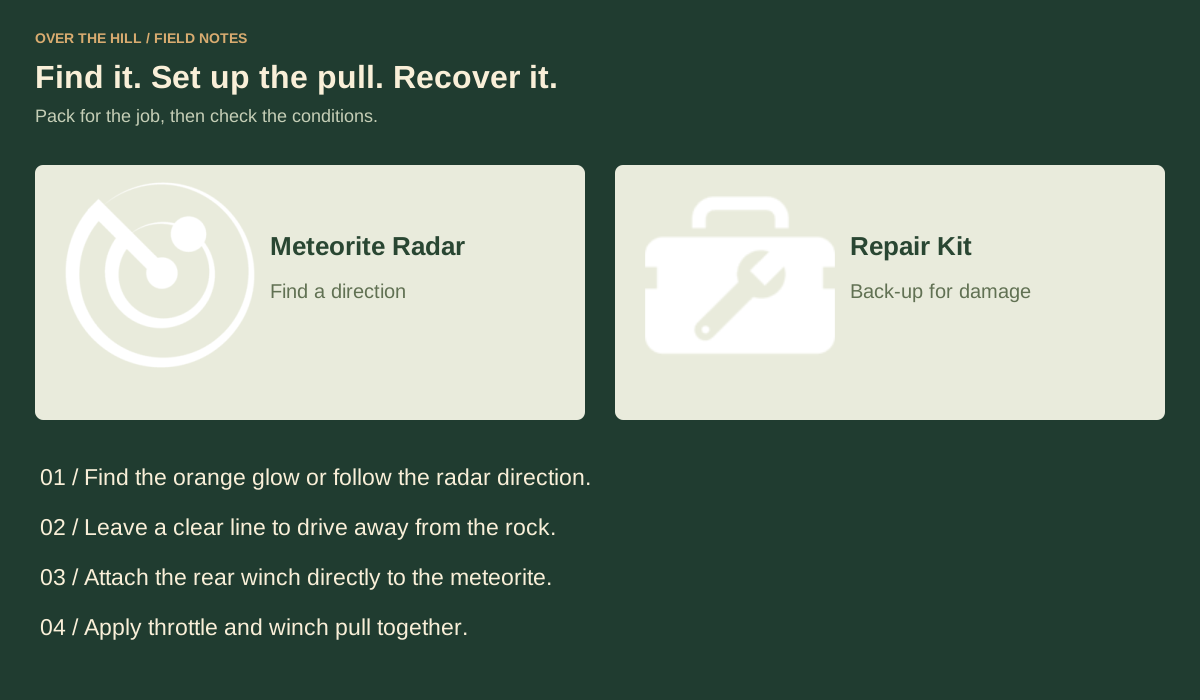
The orange glow is easier to pick out in darkness. From a safe stopping place, raise the view in photo mode and scan the surrounding slopes. Equip the Meteorite Radar at the mechanic and use it through the tool menu when you want a direction to follow. Read its compass direction, then plan an approach that gets your truck to the rock without an unnecessary ravine crossing.
Set up the pull before connecting the winch
A direct cable and a clear departure line make extraction much easier to read. Parking almost against the rock with a tree immediately behind your truck leaves very little room to work. Reposition first, even if that means a short drive around the obstacle.
Large meteorites can call for more than one player. When friends help, each assisting vehicle needs a direct connection to the meteorite. A chain of trucks pulling other trucks is not a substitute for those direct attachments.
- Stop where you can see both the rock and a clear line of ground to drive away along.
- Position the rear of your vehicle toward the meteorite, leaving space ahead for the pull.
- Select the rear vehicle attachment and connect the winch directly to the rock.
- Apply throttle and winch pull together while driving away from it.
- If it does not move, inspect the connection and the ground under your wheels before repeatedly applying more throttle.
- For a larger multiplayer pull, arrange the assisting trucks around usable ground and connect every cable directly to the rock.
Use the next 50 Pebbles where the difference will matter
After the first inexpensive upgrades, the choice gets more personal. Engine Stage 3 and Tires Stage 3 each cost 50. If your truck still cannot hold a line on slippery ground, extra engine output alone will not settle that problem. If it has grip but runs out of pull on a climb, engine is the more relevant experiment.
Read the effect labels carefully. The tyre figures are additions to a grip coefficient, not an 8% or 16% speed bonus. Water resistance extends the time before flooding; it does not give unlimited underwater driving. Later stages describe the current stock-relative effect rather than a stack of every earlier bonus.
The 675-Pebble total is a long-term garage target. You can keep exploring while building toward it. A vehicle you understand, a loadout that fits the trip and a route you can recover from are a better starting point than waiting to buy everything at once.
Common questions
Do I need to max every vehicle?
No. Fully upgrading one vehicle costs 675 Pebbles across 16 purchases. Start with the vehicle you use most and spend against the terrain or equipment limit that is actually stopping you.
Can I repeatedly collect the first-clear vehicle reward?
The vehicle unlock and the first-clear Pebble reward are separate from the smaller repeat payout. Windy Joe, for example, gives The Trail Burner and 25 Pebbles on its first completion, then 5 Pebbles on repeats.
Is the largest meteorite always the best solo target?
No. Large rocks can require additional players. Pick a rock you can reach and extract with the available trucks rather than judging the trip only by the largest possible payout.
Why did an old meteorite location turn out empty?
The map shows possible spawn positions, not guaranteed active meteorites. Positions were also adjusted in the October 16 update. Look for the glow or use the radar instead of treating a remembered Demo position as a permanent deposit.